
Showing posts with label BMW. Show all posts

Tuesday, June 11, 2013

BMW E46 Double Din Aftermarket Stereo/Indash Installation


I recently did an installation of a double din in-dash stereo into a BMW M3 (E46). The installation went very well and sounded great.
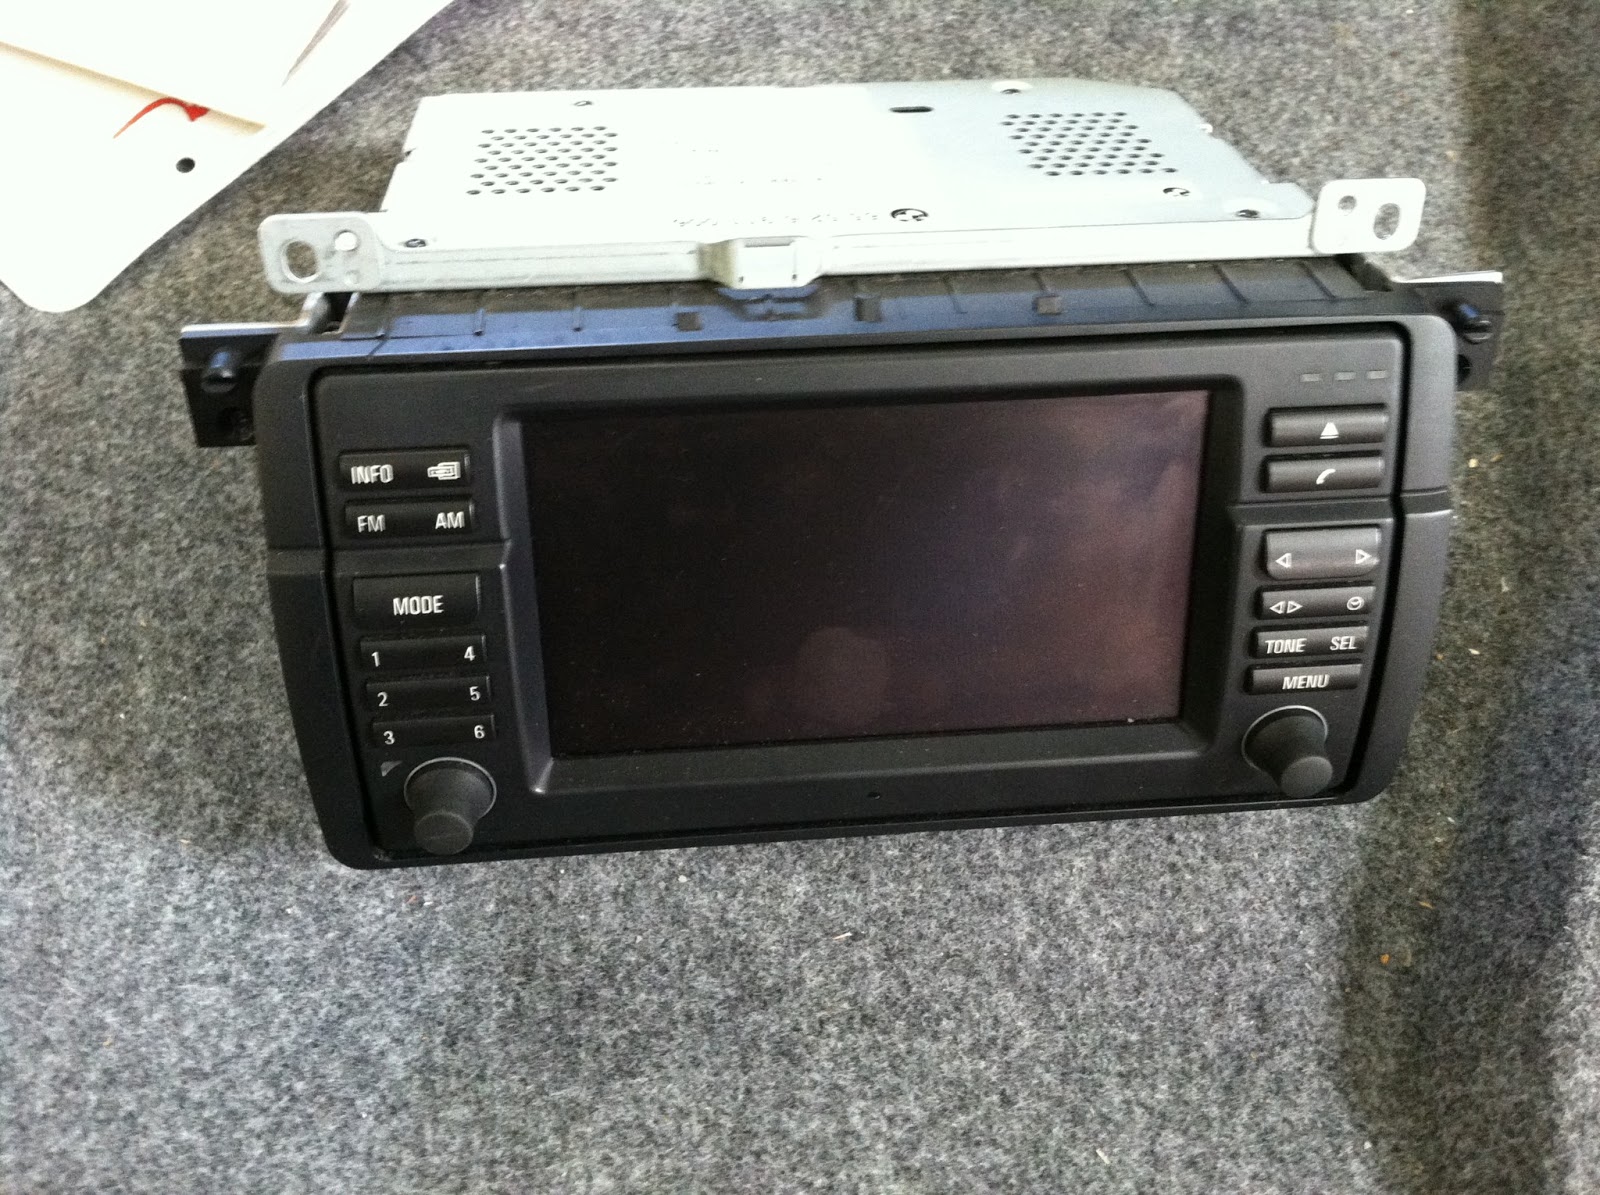
Factory BMW M3 E46 Double Din Indash Stereo
This is what the factory BMW M3 stereo looked like. 

New Parrot ASTEROID Smart Multi Media Stereo BMW E46 M3
I went with the new Parrot ASTEROID Smart multi media stereo, I was VERY IMPRESSED!!
Check out the link below for more info.

New Parrot ASTEROID Smart Multi Media Stereo BMW E46 M3
Do to the depth of this particular double din stereo, the installation will be a lot easier then installing a standar double din.

Behind Factory Stereo In BMW E46 M3
You will not have the depth to fit a standar double din stereo, unless you modify and cut some of the components that get in the way behind the factory stereo. That is why this Parrot stereo worked out so well.

Double Din Dash Kit For BMW M3 E46
You will need some parts for this installation, starting with the double din dash kit. Here are some places you can find one.

Metra 70-9003 Wire Harness
For the factory amp integration you can use the Metra 70-9003 wire harness.

Metra 40-EU10 Antenna Adapter
You will also need the Metra 40-EU10 antenna adapter in order to use the factory antenna.  

20 Foot Antenna Extension
Along with the antenna adapter you will need a 20 foot antenna extension, Metra 44-EC240
Another part you may want to take into consideration is a "Steering Wheel Control" interface.
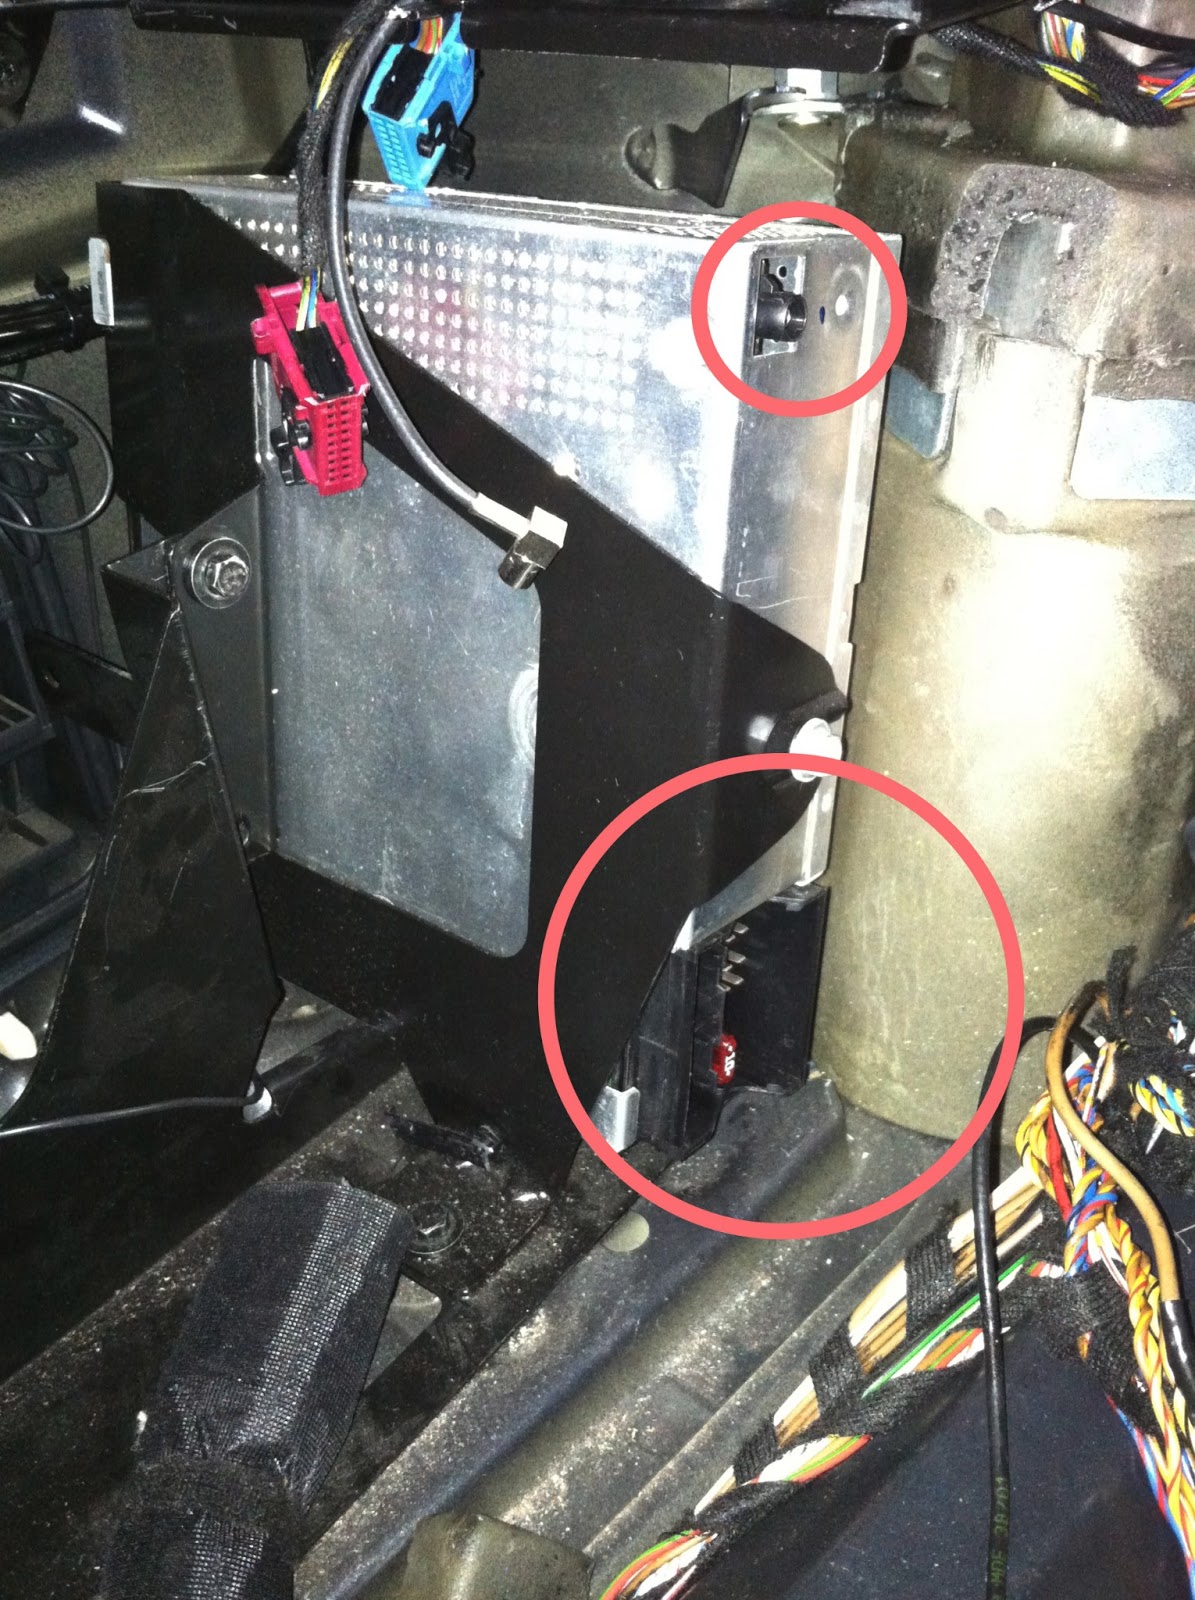
In the trunk of the vehicle on the driver side, under the trunk liner you should find the stereo tuner. The antenna plug will be located on the top corner, you will want to disconnect it and use the EU-10 to adapt it to a universal Motorola plug.

On the bottom corner you will see the reverse 70-9003 harness, disconnect it and use the 70-9003 harness to integrate into the factory amp. You will then want to extend the wires off the 70-9003 metra harness and run all the wires up behind the new stereo, including the 20ft antenna extension that you will want to connect to the (Motorola Side) of the antenna adapter. Make sure you connect your Blue/White amp turn on wire. You will want to use the (high) speaker level outputs off the back of the new Parrot stereo and connect them to the input wires you extended from the trunk. All speaker wires should be CEA color coded for easy identification. The power wires you will need to find and connect separately using a digital multi meter.
I hope this helps!

- Jeremy's Car Audio Tips


Sunday, January 13, 2013

BMW Mono Amp Install!

Installing an aftermarket Amp to power a Sub(s) in most BMW's is actually one of the easiest installations, if you know what your doing. Since you can pretty much find everything in the trunk, the install is less time consuming because all the wire runs are relatively short runs assuming you want all your gear in the trunk. The factory Amp is normally located in the trunk behind the trunk liner on the driver side. If you're keeping the factory radio you can normally tap into the factory subwoofers here for your hi level input to your aftermarket amp. 

BMW Aftermarket Amp Subwoofer Installation Jeremy Travis Vasquez
 You can also normally find the factory 12v amp turn on wire here as well and use it to turn on your new aftermarket amp . In this BMW the amp turn on wire was "Black" sometime it will be a different color like "white" or "blue" so always double check and test with a meter. When testing for the factory amp turn on wire keep in mind most the time the amp turn on wire in BMW's will have a shut off delay. Meaning the wire will stay 12v for about 30-60 seconds after the key is removed and the door has been opened.

BMW Aftermarket Alpine Amp Subwoofer Installation Jeremy Travis Vasquez
After you tap into the factory sub wires and grab your amp turn on wire from the factory amp. Run them to the new aftermarket amp location avoiding anything that could possibly damage the new wires. The main power wire can be attached to the battery which will normally be located in the trunk on the passenger side behind the plastic cover. Once you find a good grounding point attach your ground and run both wires to the new aftermarket amp as well.  

BMW Aftermarket Alpine Amp Subwoofer Installation Jeremy Travis Vasquez
 Once all your your connections are made and the subs are connected, your ready to tune your new amp! 

BMW Aftermarket Alpine Amp Subwoofer Installation Jeremy Travis Vasquez
Once properly tuned and mounted, enjoy!

-Jeremy's Car Audio Tips
#bmw #amp #sub #caraudio #soundsystem #sandiego 

Thursday, January 3, 2013

Quick Tip When Replacing Stereo In An Older BMW.

If you are going to be replacing the factory stereo in a late 90's early 2000 BMW, you may find this tip useful!

BMW Car Stereo Replacement Tip Jeremy Travis Vasquez
This is a BMW Z3

BMW Car Stereo Replacement Tip Jeremy Travis Vasquez
 Time to switch out this ancient thing!

BMW Car Stereo Replacement Tip Jeremy Travis Vasquez
The stereo is very easy to remove. Once you remove the little plastic covers on the left and right sides of the factory stereo, losen the small screws and the stereo will slide out.

BMW Car Stereo Replacement Tip Jeremy Travis Vasquez
You will notice a plastic back support braket with a hole in it. Mounted to the back will be a switching mechanism with two wires coming off it.  

BMW Car Stereo Replacement Tip Jeremy Travis Vasquez
 This little guy will cause some head ace if left as is. It will cause problems with the alarm/keyless entry system. What you will want to do is cut the Purple/Green wire and cap each end off. 

BMW Car Stereo Replacement Tip Jeremy Travis Vasquez
And that's it! Hope this tip helps!

-Jeremy's Car Audio Tips
#bmw #caraudio #car #electronics #tip #sandiego