Showing posts with label Amp Install. Show all posts

Friday, April 26, 2013

1998-2005 Lexus IS300 Main Amp Power Run Through Firewall To Rear


Toyota and Lexus vehicles are typically pretty easy to work on. Running cables/wires through the firewall to the rear is a pretty quick process. This is how I get my wires to the trunk.

Lexus IS300 Running Power Wire For Amp Through Firewall Into Car

Lexus IS300 Running Power Wire For Amp Through Firewall Into Car
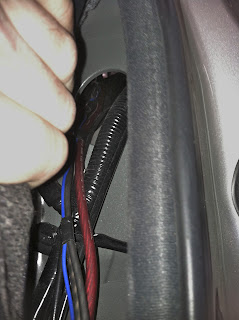
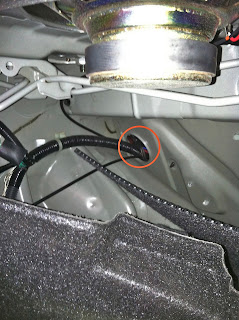
Once you locate the rubber grommet securing the factory wires through the firewall, look for an empty/hollow rubber sleeve/nipple. You can normally find one or two. You will want to cut the tip off, I normally use a pair of flush cuts.  

Lexus IS300 Running Power Wire For Amp Through Firewall Into Car
After the tip is removed, you should be able to gain access to the interior of the vehicle through that hole.

Lexus IS300 Running Power Wire For Amp Through Firewall Into Car
Now that you have the main power wire inside the vehicle, you should be able to easily run the power wire along with any additional wires under the plastic side panels to the back seat of the vehicle. Remember if you're installing an amp to power your Mid's and Hi's then you will want to run the RCA's down the opposite side of the power wire to avoid any unwanted noise. 

Lexus IS300 Running Power Wire For Amp Through Firewall Into Car
Once the wires are at the back seat,

Lexus IS300 Running Power Wire For Amp Through Firewall Into Car

Lexus IS300 Running Power Wire For Amp Through Firewall Into Car

Lexus IS300 Running Power Wire For Amp Through Firewall Into Car
Pull back on the seat, you should be able to see a big access hole to the trunk.

Lexus IS300 Running Power Wire For Amp Through Firewall Into Car

Lexus IS300 Running Power Wire For Amp Through Firewall Into Car
You should be able to easily fish the wires through to the other side, behind the liner in the trunk.

Lexus IS300 Running Power Wire For Amp Through Firewall Into Car
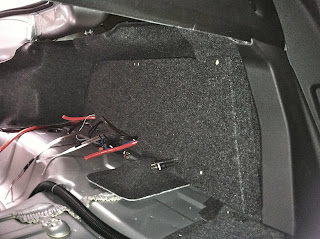
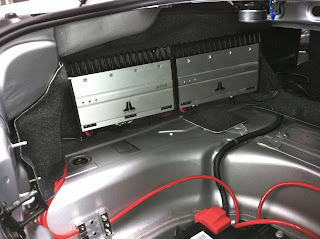
If I am installing a small amp, I typically mount it on the driver side rear panel in the trunk. This vehicle already had an aftermarket stereo, so I just installed an amp/sub. Hope this helps!
Car Audio Tips
- Jeremy 

Sunday, April 21, 2013

2012 Chevy Camaro Factory Amp Bypass - Aftermarket Amp Install


I recently had the pleasure of working on one of these vehicles. I bypassed the factory Boston Acoustics amp and installed a couple aftermarket JL Audio amps, the 300/4 and the 500/1 to be exact. It was a pretty easy install considering all the wires I needed were located in the trunk of the vehicle.  

2012 Chevy Carmaro System Factory Amp Bypass JL Audio Install

2012 Chevy Carmaro Battery Location
The battery is located under the spare tire. 

2012 Chevy Camaro Factory Amp Location
The factory amp is located in the trunk on the driver side, behind the trunk liner. 

2012 Chevy Camaro Boston Factory Amp Bypass
First disconnect the harnesses going to the factory amp. In the secondary wire harness, which should be the harness without the main heavy gauge power wires. You should be able to locate the factory amp turn on wire, it is a white wire. When testing with a meter it will have about a 30 second delay once the key is removed, until it will shut off.

2012 Chevy Camaro Boston Factory Amp Bypass
I then located all my signal wires going into the factory amp.
Front Left (+ Tan )(- Dk. Green)
Front Right (+ LT. Green/White)(- Orange/Black)
Rear Left (+ Brown/White)(- Brown)
Rear Right (+ DK. Blue)(- Tan)
After I tested the wires, I cut them from the factory amp harness and tipped them with RCA's so they can be connected to the JL Audio amps.
Then you must find all your speaker wires, I didn't use or connect the factory center speaker. You will have a total of six pairs of speaker wires you need to identify, because if you look at the rear factory speakers you will notice they have two pairs of wires going to each speaker. Each rear speaker is made up of a tweeter and a midrange driver and each component is independently wired to the factory amplifier. If you want to safely connect the rear tweeters like I did, you will want to use crossovers to eliminate the low frequency that could potentially damage the factory tweeters.
Front Left (+ Tan)(- Gray)
Front Right (+ LT. Green)(- Green)
Rear Left (+ DK. Blue/White)(- LT. Green/Black)
Rear Right (+ DK. Green)(- LT. Blue/Black)
Rear Left Tweeter (+ DK. Blue)(- DK.Blue/White)
Rear Right Tweeter (+ LT. Blue)(- LT. Blue/Black) 

2012 Chevy Camaro Sound Sytem Used JL Audio Amps
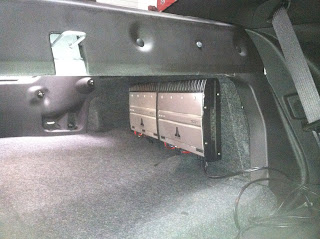
I couldn't really find any good spots to mount these amps, so I had to make a beauty board.

2012 Chevy Camaro Aftermarket Amp Sub Install

2012 Chevy Camaro Aftermarket Amp Sub Install

2012 Chevy Camaro Aftermarket Amp Sub Install

2012 Chevy Camaro Aftermarket Amp Sub Install

2012 Chevy Camaro Aftermarket Amp Sub Install
Once my board was mounted, I mounted and wired up my amps.

2012 Chevy Camaro Aftermarket Amp Sub Install

2012 Chevy Camaro Aftermarket Amp Sub Install

2012 Chevy Camaro Basic Custom Subwoofer Sealed Enclosure
Then I had to build a box, the customer wanted something basic.

2012 Chevy Camaro Basic Custom Subwoofer Sealed Enclosure

2012 Chevy Camaro Basic Custom Subwoofer Sealed Enclosure
 So I built a basic sealed enclosure for two tens (1.3CF). 

2012 Chevy Camaro Basic Custom Subwoofer Sealed Enclosure
Turned out very nice, and sounded great! With the door chime, OnStar and RAP system all still fully functional. Let me know if you have any questions.
- Jeremy's Car Audio Tips


Wednesday, January 23, 2013

Chevy Sonic 20 Minute Amp Sub Install.


If you're installing an amp for a aftermarket sub in a Second Generation Chevy Sonic, you're in luck! These vehicles are a breeze.

Amp Subwoofer Install Chevy Sonic Jeremy Travis Vasquez

Amp Subwoofer Power Wire Install Chevy Sonic Jeremy Travis Vasquez
The battery is located on the driver side, under the hood in the engine bay. Right behind the battery you will see a large rubber grommet on the firewall, you can punch right threw that to run the main power wire into the cab of the vehicle. Be sure to avoid the main wire harness that goes threw that same rubber grommet! There should be plenty of room to run your power wire threw without coming close to those wires.

Amp Subwoofer Hi-Lo Install Chevy Sonic Jeremy Travis Vasquez
If you are going to be keeping the factory stereo, the rear speaker wires are located in the driver kick panel. You can connect your line out converter/hi-lo converter to these wires. The speaker wires should be twisted, and should read about 4.2ohms on your multi meter. The rear left speaker positive should be "Green" & Negative should be "Green/Black. The rear right speaker positive should be "White" & Negative should be "Blue/Black"  

Amp Tune On Wire Chevy Sonic Jeremy Travis Vasquez
You can grab your remote/amp turn on wire at the cigarette outlet plug. 

Amp Tune On Wire Chevy Sonic Jeremy Travis Vasquez
If you remove the bottom plastic piece in the cup holder, you can easily access the wires coming off the back of the cigarette outlet plug. They will be loomed in clothe tape. The "Purple/Yellow" should be the positive, and can be used to power your amp on/off with the ignition switch. You should always double check with multi meter just to make sure you have the right wire(s).

Switched Power Amp Turn On Wire Chevy Sonic Jeremy Travis Vasquez
Once you run all your wires to your amp, find yourself a good ground.

I found a good ground right under the edge of the trunk liner. I attached a ground wire to the hollow metal support that raps around the opening of the trunk, closest to the rear fold down seats. Always double check to make sure there isn't anything that may be damaged by the screws used to mount and secure your ground wire. You will also want to remove the paint with a wire brush or sand paper, in the location you will be mounting your ground wire.

Connect your sub(s) and you're done! And you didn't even have to remove the factory stereo! 
Hope his helps.

-Jeremy's Car Audio Tips
#caraudio #car #electronics #sandiego #chevysonic #amp #install