Showing posts with label Speaker Install. Show all posts

Sunday, April 7, 2013

Jeep Liberty With Infinity Sound System Front Speaker Replacement

If you haven't replaced a pair of from speakers in a Jeep Liberty with an Infinity sound system yet, then this tip may save you a little time in the future.

Jeep Liberty With Infinity Sound System Front Speaker Replacement


Jeep Liberty With Infinity Sound System Front Speaker Replacement
When you take off the door panels and remove the speakers, you will notice each front speaker will have a small amp attached to the bottom. Remove the amps from the speakers, they should just be mounted with a couple of screws. Disconnect the factory speaker, and extend the speaker wires, the Red wires are the positives and the Black wires are your negatives. 

Jeep Liberty With Infinity Sound System Front Speaker Replacement
Unless you are adding a whole new aftermarket sound system and plan on eliminate the Infinity system, your going to want to keep these factory amps functional. The placement of these amps in the front doors when upgrading to aftermarket speakers is VERY IMPORTANT. If you do not move these amps to the right locations they will get in the way of the windows, and most likely damage the glass. You first want to move and place the amps on the out side of the window tracks, closest to the door jams.  

Make sure when you place the amps in the bottom corners, that the heat sink if facing the outside door skin.

Jeep Liberty With Infinity Sound System Front Speaker Replacement
This is what the heat sink side looks like, you don't want this side mounted up against the inside door panel. You want it facing the outside door skin inside the door panel. Otherwise, the amps will overheat. 

Jeep Liberty With Infinity Sound System Front Speaker Replacement
The mounting holes for the amps are (1 11/16 In) apart.

With a Unibit/StepBit drill two holes on the left door panel (1 11/16 In) apart at about a 55 degree angle in the location I have market in the pictures on the left. Make sure the amp and all the wires are not in the way on the other side before drilling. On the right door panel drill two hole (1 11/16 In) apart at about a 135 degree angle in the location I have market in the pictures on the right.

The amps should then mount perfectly, with the harness coming off each factory amp facing up towards the door handle. Note: you will need new longer screws to mount the amps. After the amps are mounted, connect and mount the new speakers and that should be it. Like always feel free to comment or send me an Email if you have any questions. 
- Jeremy's Car Audio Tips


Thursday, February 21, 2013

Upgrading Rear Speakers Toyota Camry With Factory JBL Sound System

If your upgrading the rear speakers in a Toyota Camry 2006-2011 (XV40) that is equipped with the factory premium JBL sound system, this tip may help. 

Toyota Camry Factory Rear Speakers
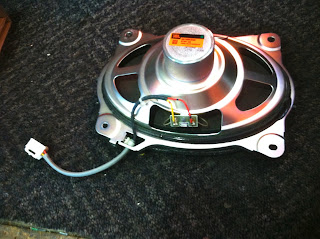
This is what the factory rear speaker should look like once removed.

Toyota Camry Factory Rear Speakers

Toyota Camry Factory Rear Speakers
As you can see there will be four wires pinned in the factory speaker harness.
You can easily identify the positive and negative wires by using a AA battery to pop the speakers, that is if the speakers are still functional. If you aren't familiar with how to test a speakers polarity with a AA battery, I will be explaining the process in a new post within the next day or two. 

Toyota Camry Factory Rear Speakers
 Once you have identified the positive and negative wires, for both the tweeter and the mid-range speaker cut the factory speaker harness off the factory tweeter and mid-range speaker. Leaving as much wire in tacked to the factory speaker harness as possible, you will need it to wire your new Alpine speaker.

Toyota Camry Factory Rear Speakers

Alpine Type E SPE-6090 Speakers
I will be replacing the factory speakers with these Alpine Type E (SPE-6090) aftermarket speakers.

Alpine Type E SPE-6090 Speakers
You will notice on most coaxial speakers the leads for the tweeter taped to the side of the magnet. 

Camry Rear Speaker Upgrade Alpine Jeremy
 In order for these speakers to work properly in these vehicles you will need to wire the tweeter and the mid-range independently. Because the output going to the factory tweeter and mid-range speaker is already crossed over, if you just connect one pair of the factory speaker wires to the new Alpine speaker you will either get just the high frequencies or just the low frequencies playing out of your new speaker, depending on what pair you connect. You can't just connect both pairs of factory speaker wires together to get full range, you would need some sort of summing module. I have already identified the wires in this vehicle "Red" wire is the mid- range speaker negative and the "yellow" is the mid-range positive. You can then cut the tweeter wires off the main terminals on the new Alpine speaker.  

Camry Rear Speaker Upgrade Alpine Speakers Jeremy Car Audio Expert
 The wire with the black stripe on the left of this Alpine speaker should be connected to the negative tweeter wire, which should be the "Black" wire coming off the factory speaker harness. Then connect the last wire which should be the "Green" wire coming off the factory speaker harness to the wire coming off the small capacitor mounted to the side of the Alpine speaker. 

Camry Rear Speaker Upgrade Alpine Speakers Jeremy Car Audio Expert
 If needed use a couple small zip ties to keep everything in place.

Toyota Camry Rear Alpine Speakers
 It's now time to plug the new Alpine speaker into the vehicle and secure it using some new mounting screws. Now just repeat the process on the other speaker, the factory wire color on the speaker harnesses should be the same on both sides.   

-Jeremy's Car Audio Tips
#car #audio #caraudio #toyota #jbl #12volt #sandiego

Wednesday, January 16, 2013

99-04 Toyota Avalon Factory Sub Replacement.


If you are looking to replace the factory 8 inch sub in a 1999-2004 (second generation) Toyota Avalon, the "Kicker Comp 4ohm  Sub" is a good fit.

The sub cover/grill can be popped of very easily, it is held on with just clips in the front two corners.
.
 This is the factory subwoofer, it's a 3.7ohm 26w sub.
-Factory sub part# 86160-AC180-

 As you can see it fit almost perfect in the factory opening.

 You will need to use different mounting screws to hold the new aftermarket sub in place.
If the sub just needs a new foam surround, you can always just use a speaker repair kit!
Hope this helps!

-Jeremy's Car Audio Tips
#car #caraudio #12volt #sandiego

Wednesday, December 19, 2012

2000-2006 Chevy Tahoe Factory Sub Upgrade, JBL 8 inch.


If your looking to upgrade the factory subwoofer in a 2000-2006 Chevy Tahoe (GMT800) this post maybe helpful. Getting to the factory sub is fairly easy and goes as followed...

The sub is located behind the rear panel on the driver side of the vehicle. 

 First remove the bottom trim, it is held in place with just clips.

Then remove the upper trim, also held in place with just clips.

 After that, remove the plastic push in retainer/clip.

 Then unscrew (counterclockwise) the plastic knob located right above the plastic push in clip.

 You are now almost to the sub. The panel secured to the driver side rear pillar must be removed, once again this panel is held in place with just clips.

 You should now be able to unclip the lower panel and access the factory subwoofer. 

The factory sub is 8 inches wide, with a depth of about 3 inches. It is a 2 ohm sub.  

The factory enclosure should support a sub with a depth of about 4 inches, anything over that will be cutting it close depending on the design of the sub. I am not sure what factory enclosures internal volume is unfortunately, but I couldn't imagine it being more than .5 cubic feet . The wires ran inside the sub can be found coming out on the top left corner of the enclosure. I powered this sub with a small aftermarket mono block amp with an output of (200W RMS @ 4 Ohms)    

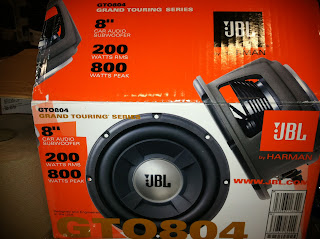
This JBL fits perfect and actually sounds really good for just a single 8 inch sub, I was impressed! 


You will need some different screws to mount this sub.

-Jeremy's Car Audio Tips
#caraudio #subwoofer #chevy #tahoe #12volt


Thursday, December 6, 2012

Honda Accord Front Speaker Installation Tips.

If you're installing a pair of new door speakers in your 2003-2007 Honda Accord, you will probably have to use 1" speaker spacers to have the proper clearance for the windows to move up and down freely. Once the speaker is mounted, I recommend cutting off the thin plastic ring on the inside door panel to allow the door panel to mount back on properly.


-Jeremy's Car Audio Tips