
Showing posts with label Mercedes Benze. Show all posts

Monday, May 6, 2013

Mercedes Benz ML 350 Overhead Installation


 I recently had the pleasure of installing an overhead LCD/DVD player in a new 2013 Mercedes Benz with a sunroof. Not to much different from any other vehicle with a sunroof, just had to really pay attention to details.   
Mercedes Benz ML 350 Overhead DVD Player

Mercedes Benz ML 350 Overhead DVD Player Installation Jeremy

Mercedes Benz ML350

Mercedes Benz ML350 Sunroof

Mercedes Benz ML350 Sunroof Overhead LCD DVD Player
I placed the overhead up to the headliner, to get an idea of where it would look and function the best. Once I had an idea of where I wanted it, I checked for clearance by dropping the driver side of the headliner. I then placed the metal mounting plate in the center of the chosen location, and double checked my measurements.

Mercedes Benz ML350 Sunroof Overhead LCD DVD Player
Once I had it centered, I traced it onto the headliner.

Mercedes Overhead LCD DVD Player Installation
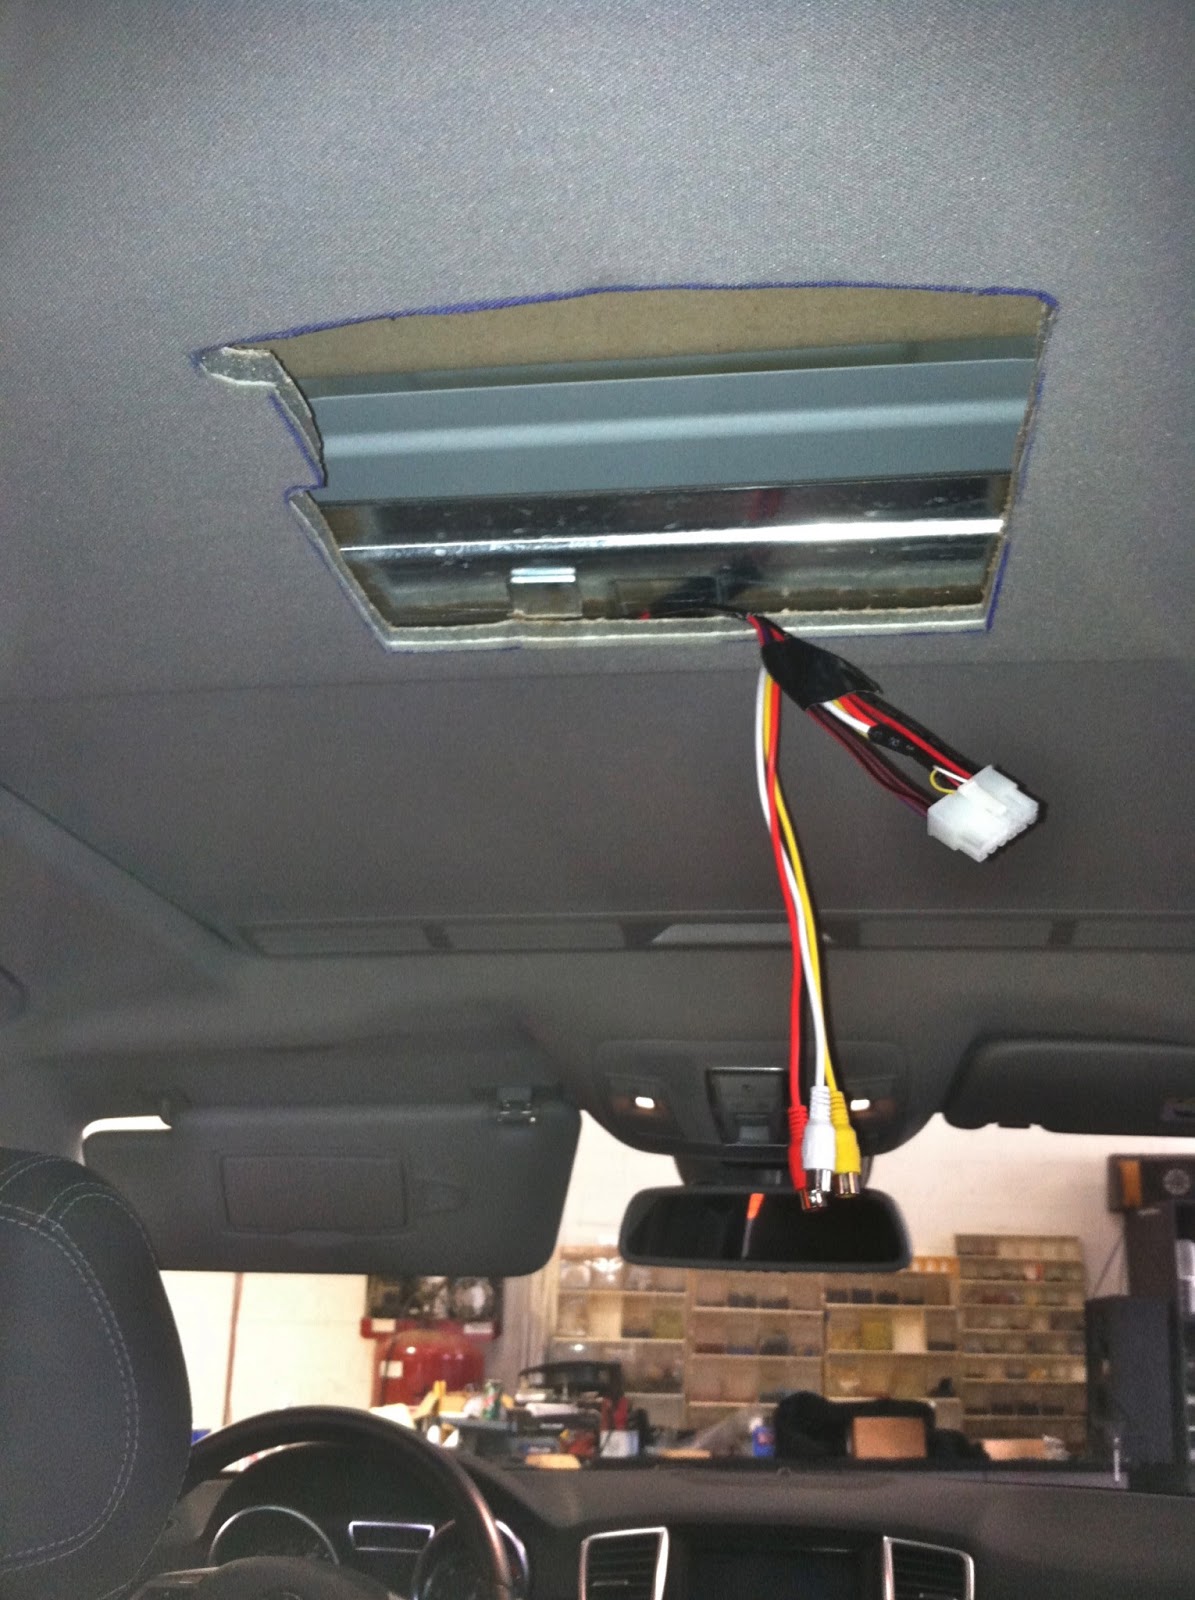
Time to cut the headliner, I slowly cut the piece of the headliner out with a razor.
(Always make sure the sun roof and sun shade are in the closed position!)

Mercedes Overhead LCD DVD Player Installation
Once the piece was cut and removed, I checked for proper fitment.
The back of the overhead mounting plate will be secured to the roofs re-enforcement bracket that runs across the roof of the vehicle. The front will be supported by the headliner.

Mercedes Overhead LCD DVD Player Installation
I riveted a piece of ABS plastic to the front egde of the metal mounting plate. This piece of ABS will rest on the top side of the headliner so when the overhead LCD/DVD player is mounted to this plate the headliner will be sandwiched in-between.

Overhead LCD Monitor DVD Player Installation
The dome light is a positive trigger system.
Constant 12 Volt - Pink/Black
Positive Dome Light Trigger - Gray/Black
Ground - Brown

Overhead LCD Monitor DVD Player Installation
On the back of the center consul there should be a power outlet that is switched power. 

Mercedes Benz ML350 Switched Power
That's where I tapped into switched power.
Overhead DVD Player Install
I used short steel rivets to secure the back side of the mounting plate to the vehicles re-enforcement braket. I had a little less then 1/4th inch to work with and using screws was just to risky. 
One other thing you must be carful with is where you run your wires, I ran mine in the little channel of space I had between the headliner and the re-enforcement braket that runs across the roof. If you don't run your wires properly you will get marks/scratches on the sun shade. 

Overhead DVD Player Install
Once I had my wires run and mounting plate secured, I mounted the overhead and tripple checked clearance. 

Audiovox Overhead DVD Player Mercedes Benz ML350
It was a tight fit but came out perfect!

Audiovox Overhead DVD Player Mercedes Benz ML350

Car Audio Tips
Jeremy

Friday, April 5, 2013

2002 Mercedes Benz G500 Switched Power

If you're going to be adding some aftermarket accessories to a G500 Mercedes Benz, chances are you will probably need to find switched power. I recently added an aftermarket In-dash/Navigation stereo in one of these vehicle. I tapped into switched power at the fuse panel on the driver side of the dash under a plastic cover.

2002 Mercedes Benz G500 Switched Power

Mercedes Benz G500 Switched Power Fuse Box
I used the empty (A) fuse terminal, designed for the rear heated seats.

Mercedes Benz G500 Switched Power Fuse Box

Mercedes Benz G500 Switched Power Fuse Box
I made my own fuse tap, with an inline fuse.
Mercedes Benz G500 Switched Power Fuse Box
I connected it to the top terminal, that should be the side that meters switched power. I recommend wiring a relay if you need more than about 1-2 amps.
(86-Switched Power From Fuse Panel / 85-Ground / 30-Battery / 87-High Current Switched Output) 
-Jeremy's Car Audio Tips 

Thursday, November 22, 2012

Portable Satellite Radio Installations, Mounting Locations?

If you or maybe your friend/customer are looking to add satellite radio to your vehicle, then a portable unit may be the best option. On most of the early 2000's vehicles, satellite radio was not a common feature to have on your OEM stereo. And if you did have the capability to add the feature, most the time the hardware is no long available, or if it is, it is extremely expensive. whatever the case. Installing a portable satellite radio unit may be the simplest inexpensive way to to enjoy Sirius or Xm while you're on the go. Some of you may also be a little confused and say Sirius? XM? didn't they merge into one company? Well yeah, in some aspects but it's kinda complicated right now. In order to activate a XM portable unit on a XM account, you will need a unit with a (Alfa-Numeric ID) and in order to activate a Sirius portable unit on a Siriur account the unit must have a all (Numeric Serial Number). What makes it even more confusing is that most the portable satellite radio units will be labeled "SiriusXM" these units are actually made for the XM side and have "Alfa-Numeric" IDs...Anyway, check out some of the installs I did. 

Jaguar

 I like to take advantage of unused ashtrays and or small closing pockets when it comes to the placements.

Sometime to get the pocket or ashtray out, it requires quite a bit of disassembly. 

 Once I have the ashtray or pocket removed from the vehicle, most of the time I use ABS plastic to fabricate a mount to secure it in place.

 You always want to check and ensure clearance of the wires on the back of the unit, and always rout the wires away from moving parts.

This unit fit perfectly!

With the ashtray open you can see and operate the unit. 

With it closed you can't see any aftermarket components everything is hidden, but you can now enjoy your satellite radio!  


 Mercedes

 Same thing as the Jaguar, I first removed the ashtray

 Then I made a mounting braket out of ABS plastic.

Before I mounted it I checked for clearance.
Once mounted, it was ready to be connected!

It turned out really nice!

Can't even tell it's there.

This satellite radio was installed into smaller pocket above an ashtray


This was another Mercedes, the satellite radio unit was installed in a small pocket right below the ashtray.

The bottom of the pocket could actually be remove, making the mounting fairly easy.


Once again always make sure you have proper clearance for the wires
that will need to be connected.

 This one came out really nice! And was probably the easiest one to install.


Always keep in mind these units are ment to be portable, so if mounted into small pockets or ashtrays you may not be able to remove them as easily, or you may not be able to move them at all. But that is just something you wanna go over before the install :) anyway that's it, till next time...

-Jeremy's Car Audio Tips
#sirius #xm #car #caraudio #caraudiotips #sandiego #12volt