Thursday, November 22, 2012

Tesla Roadster 2.0 Flip Out In-Dash & Rear View Camera Install.

This is one of the installations I did on a Tesla Roadster 2.0 I went with a motorized Kenwood In-Dash that had navigation/bluetooth and I added a IPod cable and rear view camera. Everything came out perfect! If you have seen the JVC this vehicle comes with, then you could imagine how happy the owner was after we installed this new system for him.   

Kenwood indash stereo plus rear view camera Tesla Roadster 2.0 sport

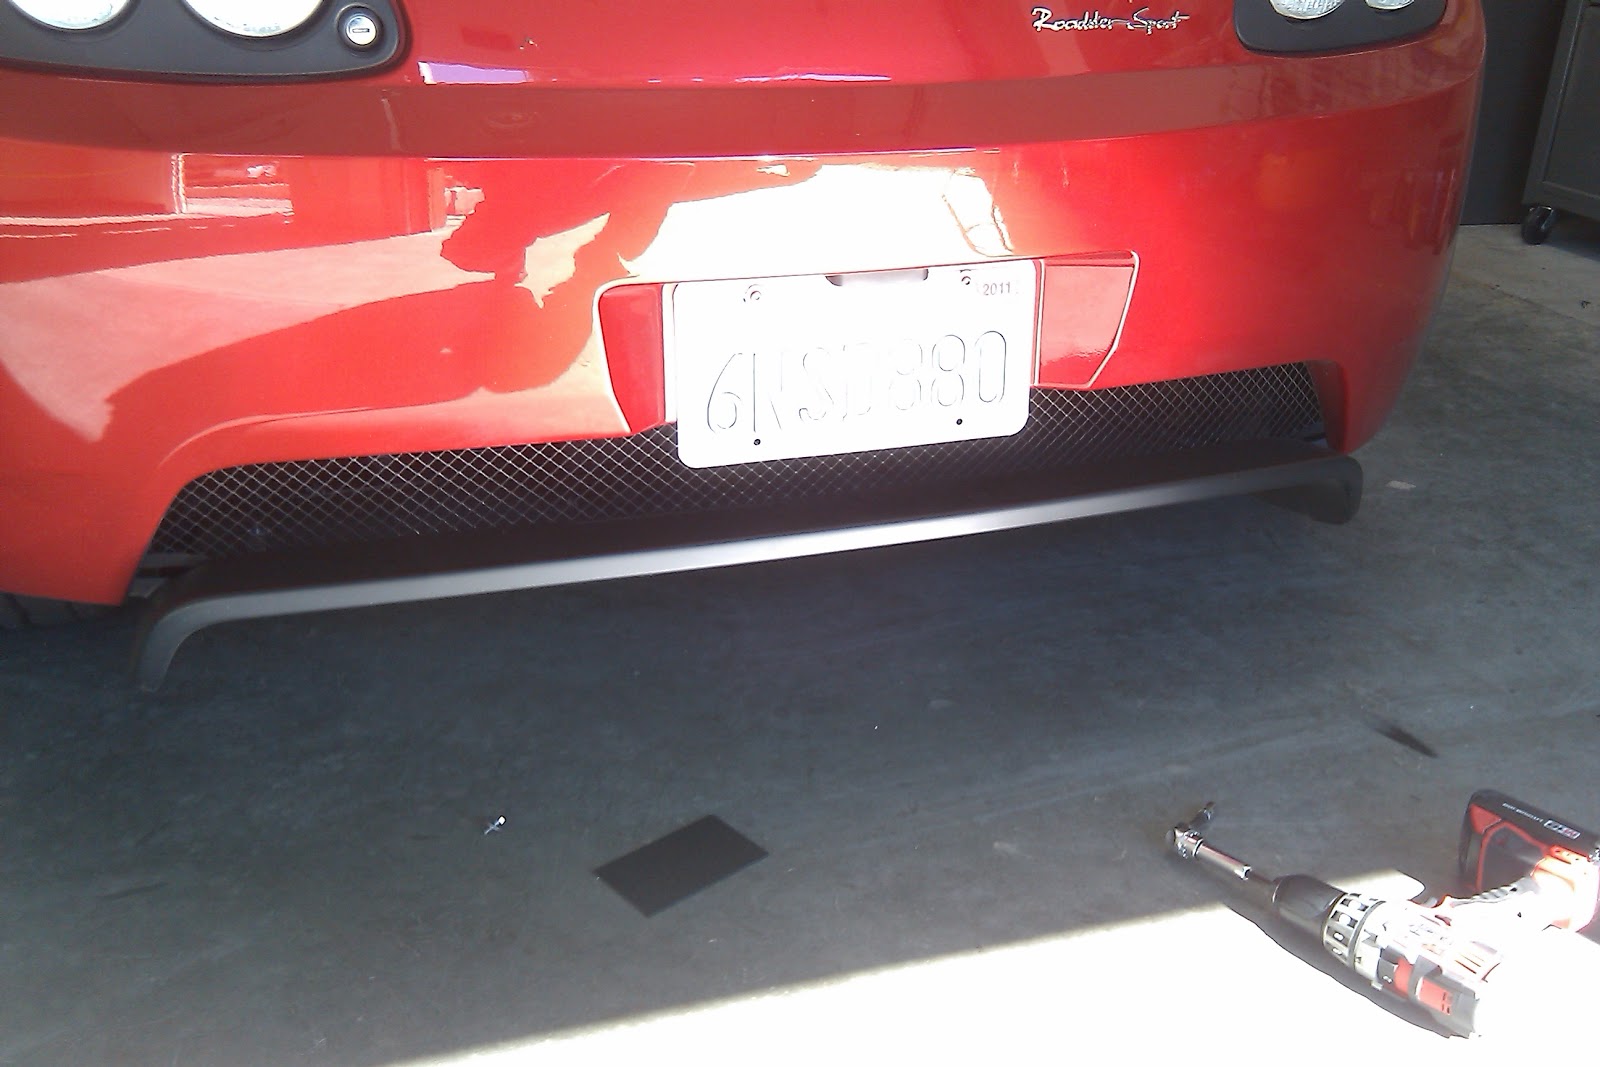
Before I could mount the rear view camera, I had to drop the rear panel under the back of the vehicle. It is fairly easy to do, because it is just a piece of plastic

This is a picture of what the factory JVC looked like

Once the JVC was removed I then wired the new Kenwood harness into the vehicle


Jeremy Tesla Roadster 2.0 Indash Rear View Camera Installatin
To mount the rear view camera, I first cut two identical pieces of black ABS plastic into rectangles about 3in wide and 4in tall. Then I used a hole saw that was the same diameter as the flush mount rear view camera, and cut a hole through both pieces in the same spot. After that I took both pieces of ABS and mocked them up in the center, right below where the license plate mounts with one piece of ABS on each side of the plastic mesh. I was able to wedge the pieces of ABS down into the same grove the plastic mesh sits in across the bottom piece of the bumper. Once positioned to my liking, I cut the plastic mesh in the center holes of the ABS. With that removed I could now slide my rear view camera in through the two pieces of ABC with the plastic mesh sandwiched between holding everything into place. To make it a little more secure, I riveted the two pieces of ABS together right above the rear view camera, and used a plastic screw cover to make it look finished.  

Jeremy Tesla indash rear view camera custom
I hid all the navigation and bluetooth hardware behind this pocket on the driver side, up to the right, there was plenty of room

Jeremy Travis Vasquez
 If you can notice the windshield wiper lever had to be modified in order to allow the in-dash to open and close properly without having to turn on the windshield wipers. 


Jeremy Kenwood Indash rear view camera Tesla roadster 2.0
This is what the factory windshield wiper lever looks like before any modifications

Custom install kenwood Indash rear view camera Tesla Roadster 2.0 Jeremy Travis Vasquez
First I cut about an Inch off and took the two main pieces apart. I then used a piece of black ABS plastic and cut and filed it so it fit perfectly

Jeremy Tesla Roadster 2.0 Indash rear view camera install
Then I glued all the pieces together

Jeremy Vasquez Car Stereo Upgrade Tesla Roadster 2.0
Once the glue had cured fully, I lightly sanded the hole lever

Jeremy Travis Car Stereo Upgrade Tesla Roadster 2.0
 After I polished it with a dremel it was all finished and looked great!

  Unfortunately you will lose the white markings on the windshield wiper lever, but personally I think it looks better without them :-) anyway that's it...Let me know if anyone has any questions! 

-Jeremy's Car Audio Tips


Tuesday, November 20, 2012

1997-2004 C5 Corvette Double Din/In-Dash Car Stereo Install, Yes It Is Possible!


Are you looking to upgrade your car stereo in your 1997-2004 C5 Corvette? Do you want a full double din in-dash? Well you are in luck! Most of you may know the 1997-2004 Corvettes come with a din and a half factory stereo size, so fitting in a full double din in-dash has pretty much been out of the picture, unless you could find a good installer to custom fit one for you. Well I have found a company that makes GREAT custom dash panels for these vehicles that can save you a lot of time and headache.       

C5 Custom Double Din Install In Corvette

Corvette Stereo Upgrade Navigation

Jeremy Travis Custom Install C5 Corvette
This is what the factory stereo looks like, as you can see it's not a full double din.

This is the panel custom made for a double din car stereo from

C5 Corvette
Fitting the new stereo will require some time and patience in order to get it positioned just right. You will first need to remove the metal brackets that are riveted horizontally behind the stereo and below the A/C controls. Once the stereo is positioned just right you will then need to relocate the A/C controls slightly lower. There are also a couple metal tabs above the stereo you will need to bend up in order to get the stereo to fit right.  

Perfect Kenwood Double Din Installed C5 Corvette By One Of The Best Jeremy Vasquez
As you can see it really comes out nice! I have done quite a few of these with great results.


Double Din Installed C5 Corvette By One Of The Best Jeremy Vasquez

Double Din Installed C5 Corvette By One Of The Best Jeremy Vasquez
These are just a couple of the ones I did, I wish I had pictures of the others. Unfortunately I lost a lot of my work pictures. If you got any questions let me know...If you wanna inquire about the custom panels I will post the link again below.

-Jeremy's Car Audio Tips
#corvette #caraudio #caraudiotips #car #sandiego #custom #doubledin

Monday, November 19, 2012

How To Remove/Replace A Vehicle's Window Handle/Crank


If you are replacing your door speakers and or need to remove the window handles for whatever reason, here are a couple pictures and tips. It is very easy to do if you have the proper tool. If you don't have a window handle removal tool then you will need a thin pick tool or small flat head screwdriver.


As you can see the clip is very close to the handle, making it difficult to get to with a pick or screwdriver. If you don't have the handle removal tool, use a plastic panel removal tool or something that will not damage the door panel. Wedge it between the window handle and the small plastic ring that is normally between the handle and the door panel. This should give you just enough room to get a small pick or flat head screw driver in there to remove the clip, holding the handle in place.

If you have the window handle removal tool simply slide it between the handle and the small plastic ring that is between the handle and the door panel. Sometimes there will not be a plastic ring and in that case just slide it between the handle and the door panel itself. Be careful, sometimes this ring will shoot off and is very hard to find. If you don't have a replacement you won't be able to clip your handle back on unless you get another one. To avoid losing it you can put your hand or tape over the opposite side of the handle removal tool. If you do lose one, you can normally find a replacement at any car audio shop or auto parts store  
Replacement window clips 

 And that's is pretty much it!


When putting the handle back on don't forget to put the plastic ring back in place if there is one

When reinstalling the handle push the clip back into place

 and push the handle back on, you should hear it clip back into place

You can give it a little pull just to make sure it's clipped back on securely, and that's it. Here is a link if you wanna purchase the handle removal tool, it will make it a lot easier and it should only run you about  five bucks. Vehicle Manual Window Removal Tool
If you got any questions let me know ;)

-Jeremy's Car Audio Tips

Friday, November 16, 2012

Installing A Remote Start? How To Tell If The Vehicle Is Equipped With A Anti-Theft Transponder Based Immobilizer System.


 If you are installing a remote start system into your vehicle or having someone install it for you, you should first find out if you will need a immobilizer bypass module. Here is a quick way you can find out if your vehicle is equipped with a anti-theft transponder based immobilizer system.  

Get a piece of tin foil about 2sf and fold it in half about 4 times
Take your key off any key chains
Place it on the corner of the tin foil
Fold the tin foil over the top of the key
Tightly rap the key in tin foil making sure the top of the key is completely covered. Them stick it in the vehicles ignition switch and try to turn it over. If the key will not turn in the ignition switch or the vehicle will turn over but will not start or starts briefly and then dies, then your vehicle is equipped with a anti-theft transponder based immobilizer system. You will need to purchase a immobilizer bypass module to temporarily disable the anti-theft system, in order to remote start your vehicle without the key in the ignition switch. You can get these bypass modules from various manufactures, and sometimes you will need several keys to program them correctly, in some cases you will even have to give up one of your keys permanently. I usually use Flashlogic modules, they normally go for about $99 and if you can't figure out how to flash it or install it, your local car audio shop should be able to help you out :) Let me know if anyone has any questions...  http://www.flashlogic.com/
#caraudio #tips #caraudiotips #sandiego #remotestart #12volt #tramsponder #car #chevy

-Jeremy's Car Audio Tips