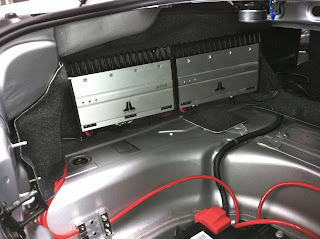
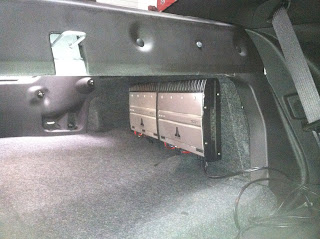
I recently had the pleasure of working on one of these vehicles. I bypassed the factory Boston Acoustics amp and installed a couple aftermarket JL Audio amps, the 300/4 and the 500/1 to be exact. It was a pretty easy install considering all the wires I needed were located in the trunk of the vehicle.
The battery is located under the spare tire.
The factory amp is located in the trunk on the driver side, behind the trunk liner.
First disconnect the harnesses going to the factory amp. In the secondary wire harness, which should be the harness without the main heavy gauge power wires. You should be able to locate the factory amp turn on wire, it is a white wire. When testing with a meter it will have about a 30 second delay once the key is removed, until it will shut off.
I then located all my signal wires going into the factory amp.
Front Left (+ Tan )(- Dk. Green)
Front Right (+ LT. Green/White)(- Orange/Black)
Rear Left (+ Brown/White)(- Brown)
Rear Right (+ DK. Blue)(- Tan)
After I tested the wires, I cut them from the factory amp harness and tipped them with RCA's so they can be connected to the JL Audio amps.
Then you must find all your speaker wires, I didn't use or connect the factory center speaker. You will have a total of six pairs of speaker wires you need to identify, because if you look at the rear factory speakers you will notice they have two pairs of wires going to each speaker. Each rear speaker is made up of a tweeter and a midrange driver and each component is independently wired to the factory amplifier. If you want to safely connect the rear tweeters like I did, you will want to use crossovers to eliminate the low frequency that could potentially damage the factory tweeters.
Front Left (+ Tan)(- Gray)
Front Right (+ LT. Green)(- Green)
Rear Left (+ DK. Blue/White)(- LT. Green/Black)
Rear Right (+ DK. Green)(- LT. Blue/Black)
Rear Left Tweeter (+ DK. Blue)(- DK.Blue/White)
Rear Right Tweeter (+ LT. Blue)(- LT. Blue/Black)
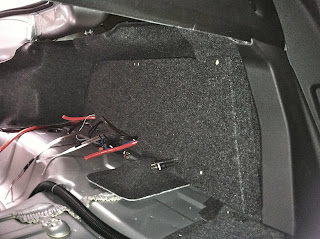
I couldn't really find any good spots to mount these amps, so I had to make a beauty board.
Once my board was mounted, I mounted and wired up my amps.
Then I had to build a box, the customer wanted something basic.
So I built a basic sealed enclosure for two tens (1.3CF).
Turned out very nice, and sounded great! With the door chime, OnStar and RAP system all still fully functional. Let me know if you have any questions.
- Jeremy's Car Audio Tips


Very good information! Thank you. Darian - Hurricane Audio Marco Island, FL
ReplyDeleteThanks Darian!
Deletethanks
ReplyDeletethis was really helpful
Hello, do you have a video for this tutorial? Thanks!
ReplyDeletecan i tap into the signal wire you stated and add a loc and be good just want to add another sub
ReplyDeleteThanks for this, great info! I just upped the free air sub in my 2013 Camaro Convertible, and the wires are exactly the same. I put in two 4" 2x4 blocks to make a stand-off for the cargo shade, then mounted the amp on the rear trunk firewall so it's out of the way. The blocks have a hole in the back to go over the old bolt where the cargo shade was, and fit in the existing liner dents. The top comes down and rests on the blocks, so I routered everything smooth so it won't wear over time. Installation was a snap, nothing beats a battery in the trunk!
ReplyDeleteThanks again for the wire colors. The subthump.com harness was on back order, so this saved me $80 and a bunch of wire probing.
Dude you are the man!!!! Thanks, you do really good work.
ReplyDeleteI replaced the rear deck speakers. How would I by this amp just to amp up my replacement speakers I have 3 way coaxial speakers and its either low side or high side
ReplyDeleteHow would I bypass the amp to amp up my coaxial speaker in the rear deck. Right now it's only hooked up on the low side. It's either that or high side.
ReplyDelete