Wednesday, December 19, 2012

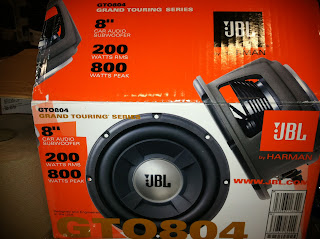
2000-2006 Chevy Tahoe Factory Sub Upgrade, JBL 8 inch.


If your looking to upgrade the factory subwoofer in a 2000-2006 Chevy Tahoe (GMT800) this post maybe helpful. Getting to the factory sub is fairly easy and goes as followed...

The sub is located behind the rear panel on the driver side of the vehicle. 

 First remove the bottom trim, it is held in place with just clips.

Then remove the upper trim, also held in place with just clips.

 After that, remove the plastic push in retainer/clip.

 Then unscrew (counterclockwise) the plastic knob located right above the plastic push in clip.

 You are now almost to the sub. The panel secured to the driver side rear pillar must be removed, once again this panel is held in place with just clips.

 You should now be able to unclip the lower panel and access the factory subwoofer. 

The factory sub is 8 inches wide, with a depth of about 3 inches. It is a 2 ohm sub.  

The factory enclosure should support a sub with a depth of about 4 inches, anything over that will be cutting it close depending on the design of the sub. I am not sure what factory enclosures internal volume is unfortunately, but I couldn't imagine it being more than .5 cubic feet . The wires ran inside the sub can be found coming out on the top left corner of the enclosure. I powered this sub with a small aftermarket mono block amp with an output of (200W RMS @ 4 Ohms)    

This JBL fits perfect and actually sounds really good for just a single 8 inch sub, I was impressed! 


You will need some different screws to mount this sub.

-Jeremy's Car Audio Tips
#caraudio #subwoofer #chevy #tahoe #12volt


Sunday, December 16, 2012

Orion Car Audio Sub Repair.

In most cases when a speaker isn't working properly you would think the speaker needs to be replaced. However that's not always the case, most the time you can actually repair the speaker for a significant amount cheaper. Don't be afraid to investigate the problem! This particular sub froze up after the owner hit a big bump while driving his car.

Orion Car Audio Sub Repair Jeremy Travis Vasquez Car Audio Tips
I first separated the rubber "surround" from the "basket"

Orion Car Audio Sub Repair Jeremy Travis Vasquez CarAudioTips.com
I then separated the "spider" from the "basket".

Orion Car Audio Sub Repair Jeremy Travis Vasquez CarAudioTips.com
 Next I removed the bolts holding the "terminals" to the "basket".

Orion Car Audio Sub Repair Jeremy Travis Vasquez CarAudioTips.com
 After that the "cone" "spider" and "voice coil" was able to be pulled free.

Orion Car Audio Sub Repair Jeremy Travis Vasquez CarAudioTips.com
 Revealing the problem! The "pole" is pinched against the "top plate" not allowing the proper movement of the "voice coil"

Orion Car Audio Sub Repair Jeremy Travis Vasquez CarAudioTips.com
After taking a closer look I noticed the "magnet" had actually broken free from the "top plate" all I needed to do was glue them back together! In order to get the "pole" positioned dead center I used thin wooden shims. I first placed the wooden shims between the "pole" and the "magnet", after applying a thin layer of JB Weld I then slowly lowered the "basket" that still had the "top plate" attached to it onto the "magnet". Be very careful when disassembling and reassembling the speaker, in most cases they use very strong magnets and anything caught between them will be damaged! Including fingers. I set a wight on top of the basket and waited for the glue to fully set. Once that was done, I glued the " spider and rubber "surround" back into place and reconnected the "terminals" to the "basket". Done and done! This repair cost $5 in materials, replacing the sub would have ran about $200. Not bad! Any questions let me know, if you need speaker repair parts  or the glue check out this sight.
Speaker Repair

-Jeremy's Car Audio Tips

Thursday, December 6, 2012

Honda Accord Front Speaker Installation Tips.

If you're installing a pair of new door speakers in your 2003-2007 Honda Accord, you will probably have to use 1" speaker spacers to have the proper clearance for the windows to move up and down freely. Once the speaker is mounted, I recommend cutting off the thin plastic ring on the inside door panel to allow the door panel to mount back on properly.


-Jeremy's Car Audio Tips

Monday, December 3, 2012

Classic Ford Map Light Repair.

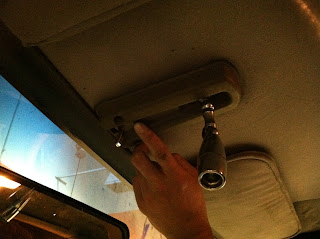
If you have a classic Ford that has one of these "map lights" that is not working. Here is the common fix. First take a digital multi meter and make sure you have 12v at the main power wire under the map light. Once you confirm the power wire is ok and the actual light bulb is good, you can move on to this step. 
Classic Ford Mustang Map Light Repair jeremy Travis Vasquez Car Audio Tips .com
this little pin switch is most likely the problem

Classic Ford Mustang Map Light Repair jeremy Travis Vasquez Car Audio Tips .com
you must first remove the plastic cover by cutting the small plastic welded points

Classic Ford Mustang Map Light Repair jeremy Travis Vasquez Car Audio Tips .com
once you carefully remove the plastic cover, be carful not to lose the spring that holds the metal conection ring in place 

Classic Ford Mustang Map Light Repair jeremy Travis Vasquez Car Audio Tips .com
you now need to clean the contacts and the copper connection ring with a wire brush, once it's free of corrosion resemble reversing the order used to dissemble 

Classic Ford Mustang Map Light Repair jeremy Travis Vasquez Car Audio Tips .com
 you will now need to find a way to keep that plastic cover in its original place, I used plastic welder glue. Super glue or a good strong quick drying glue should work just fine

Classic Ford Mustang Map Light Repair jeremy Travis Vasquez Car Audio Tips .com
And that's it!! All done, I actually really like these map lights, I wish I had one in my truck :)

-Jeremy's Car Audio Tips
#ford #fordmustang #car #caraudio #caraudiotips #sandiego #12volt